Table of Contents:
- Required Account Data
- Adding Divisions
- Adding Managed Companies
- Adding Company Details
- Adding Users
- Adding Locations
- Adding Cost Centers
- Adding Services (also known as Activities)
- Adding Resources
- Adding/Managing Connections
Required Account Data
You’ll need some options to appear in the job’s core fields before you can click Save and create a new job.
-
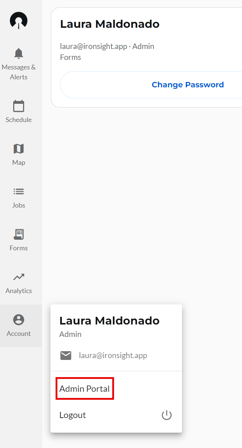
Click the Account icon in the left navigation bar
-
Then click Admin Portal. A new window will open up.
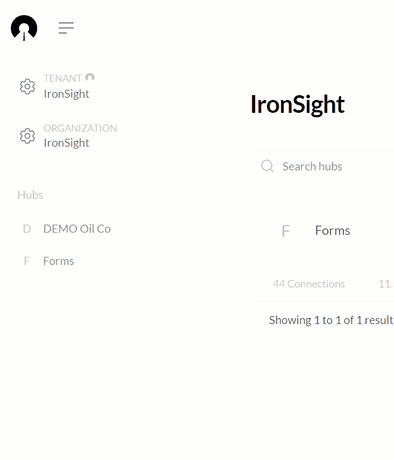
- Click on the Organization.
-
Starting with Users at the left, you’ll work your way right to enter your operation’s data into each category
Add Divisions
Divisions can be used to separate your operation by function (i.e. Well Servicing, Maintenance) or geography (i.e. North Field, South Field). This helps you filter the schedule, map, and job list to keep your team focused.
To add a Division:
- Click on Divisions, under the Organization tab
-
Click New
-
Enter a Name
- Select the Owner hub.
-
Choose a color, which is useful for visually distinguishing what division the jobs and units belong to on the schedule view.
-
Click Save

Add Managed Companies
This is where you’ll add the companies you work with. If you are on the demand side, add your service providers. If you are on the supply side, add your clients.
Note: an Un-Managed Company is a Service Provider who uses IronSight as their own dispatching Software for all their customers.
To add a Managed Company:
- Click on Managed Companies
-
Click New
-
Enter the Company Name
-
Enter a Short Code. This is displayed in certain parts of the interface where space is limited. 16 character max.
-
Optional: Enter the company's primary dispatching email, if unsure leave blank
Important note: This email address will receive an email when a job is assigned to the company or one of their resources -
Optional: Enter a billing address, which may be used for field ticketing.
-
Click Save

Add Company Details
This is where you will be able to add your organization's full name, company short name, primary contact and billing address
To add Details:
- Click on Details
- Enter the company information in the appropriate fields
- Click Save

Add Users
Add the people required to run your operation, such as a requesters, field workers, coordinators, or admins, who belong to your organization.
To add users:
- Click on the desired hub
- Ensure Users is selected
- Click on New
- Enter their Name, Email, Phone (optional), Default Team (optional)
- Select the appropriate role the user will have within the platform
- Add attributes, if applicable
- Click on Save
Each role can be configured using the toggles, to provide the desired permissions

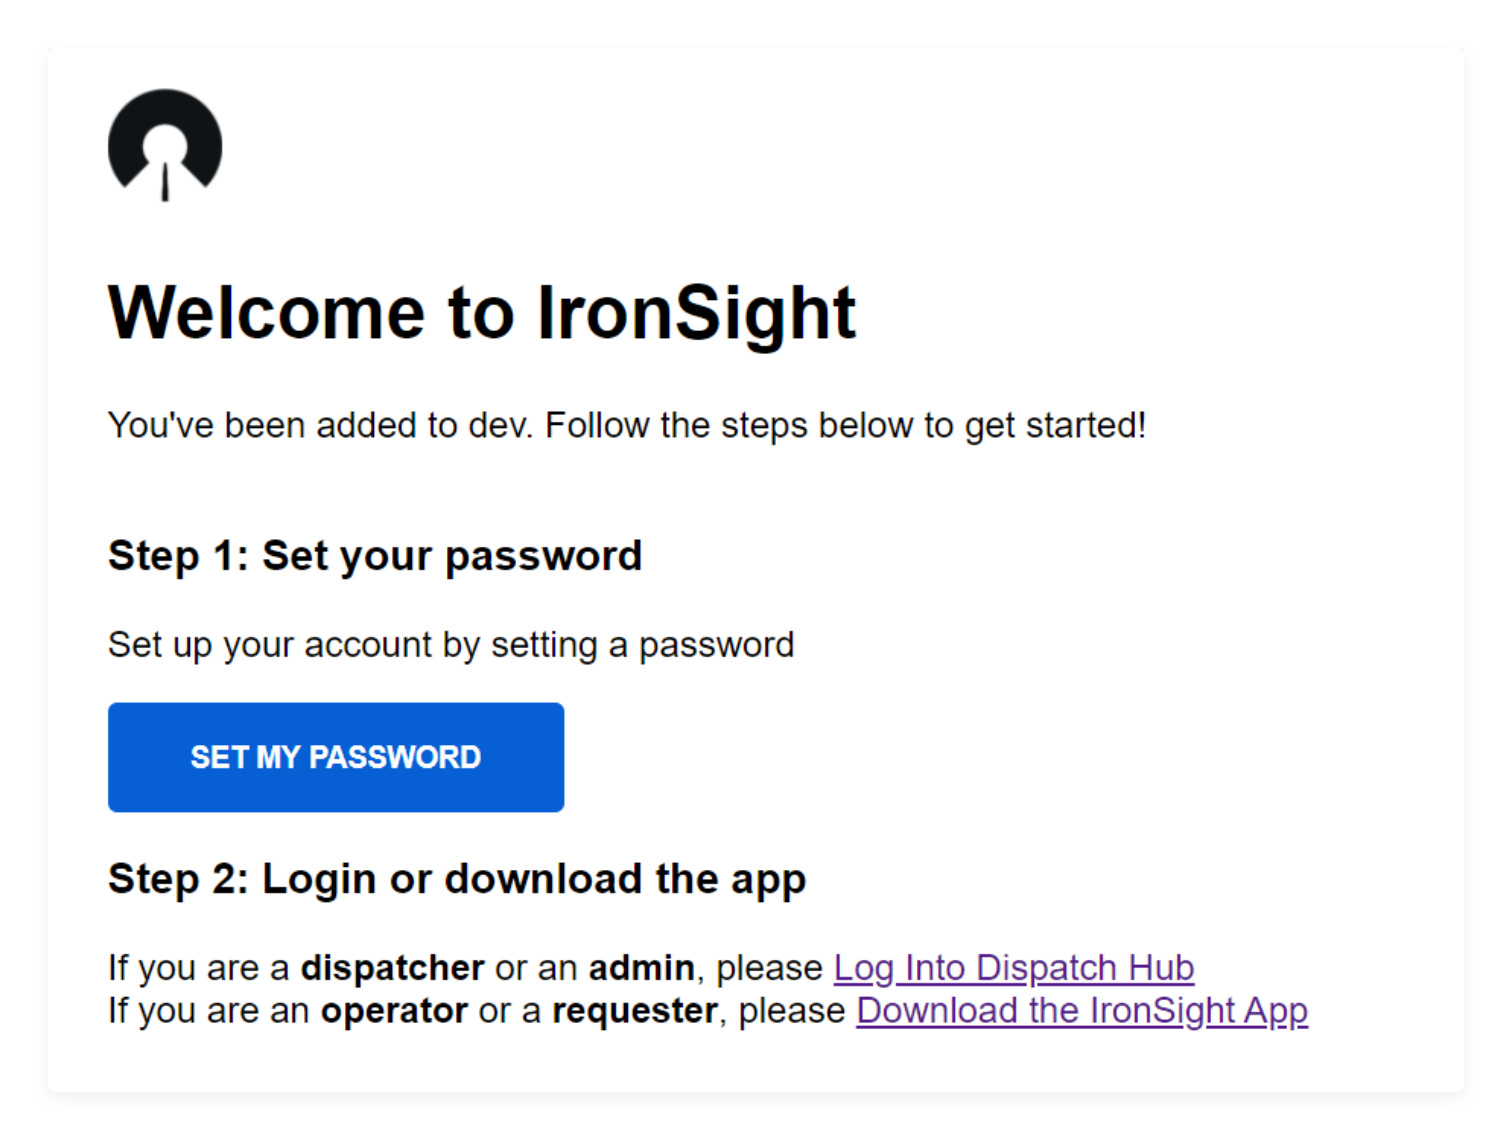
Users added to IronSight will receive a welcome email that will instruct them to set a password and start using IronSight’s web or mobile app.
Once you’ve added at least one user with the Requester role, and one user with the Operator role, move on to the next step to tie everything together.
Archiving & Unarchiving Users
Ironsight also allows you to update information and/or remove the user's access to the platform when needed.
Visit the Users tab and click on the name of the user you would like to update or remove

Update the information and click Save, or Click on Archive and then Ok.


If the user needs to be "unarchived". Click on the Archived tab, then click on the name of the user you would like to Unarchive. They will now be available to assign Jobs.


To add users to a Managed Company (your Service Providers), you will need to go into that company, under your Connections. See Manage Connections section
Add Locations
This is where you’ll add work sites that are relevant to your field services (locations where work will be performed). For example: wells, facilities, batteries, tanks, assets, yards, chemical stations, vendor yards, SWDs, etc. During implementation, IronSight typically bulk imports your location list.
When you need to add another Location:
- Click on Location
-
Click New
-
Enter a Location Name
- Select the cost center associated with this location (Optional). Associating a Cost Center will default the cost center value for any jobs with this location. Tip: you need to create each Cost Center separately, before associating them to a location.
- Choose Location Type
- Optional, choose Location Status
- Select the company that owns this location, it may be your organization or it could be a partner company.
-
Enter a description, which gives fields users useful information about the location.
- Optional, add Parent Location
-
Add Latitude and Longitude coordinates. If you do not have the coordinates, click this video to see how you can add a location to IronSight with a little help from Google Maps.
-
Optional, add Geofence radius
- Tags are optional and can be created at the time of adding a location.
-
Click Save


Add Cost Centers
A Cost Center is a number within an organization to which costs may be charged for accounting/tracking purposes. These can be associated with locations so that they auto-populate during job creation.
To add a cost center:
- Click on Cost Centers
-
Click New
-
Enter a Name
-
Optional, Enter a Description
-
Click Save

Add Services (also known as activities)
Services are types of work that a given resource can perform. For example, a 'Haul to Disposal' service can be completed by a 'Tank Truck' and a ‘Vac Truck’ resource. Services are useful for analytics and make creating jobs fast and less prone to mistakes.
To add a Service:
- Click on Services
-
Click New
-
Enter a name
- Select Approval Level
-
Choose what Resource Types can perform this Service by multi-selecting the checkboxes.
- Select the PDF template to be used for this service
- Select Job Form(s) to be automatically attached to all jobs with this service
- Select the inventory to be associated with this service
- Click Save

Adding resources under the hub is used to add internal resources only. Resources get assigned to a job along with an operator. You can track resources on a map as they are executing work. In IronSight a resource can be a:
-
Unique truck number, such as TT #87, which is a unit in a Tank Truck fleet
-
Role on a field team, such as Electrician #1, which is one of many Electricians required on a daily basis
To add a Resource:
- Click Resource
-
Click New
-
Enter a name
-
Enter a helpful description, such as truck specs
-
Enter Ticker Text, which will appear under the resource on the Schedule View and can be used for things like equipment specs, hourly rates, etc.
- Choose what Resource Type the unit is
-
Optional, choose what Division the resource works in
-
Optional, Click on the toggle next to "Status Online" if you do not want the resource to appear as an offline resource in Schedule View
-
Click Save

Add/Manage Connections
Your Connections are your partner companies, like Service Providers, Vendors, Distributors and Clients.
To add Connections:
- Click on Connection
- Click on Available
- Locate the company you would like to add and click on "Partner". If the company you are looking for is not under the "Active" nor "Available sections, you can add the company by going back to the "Managed Companies" tab, under the Organization.
- Click "Ok"

To Manage Connection:
- You can add/remove users, locations and resources for all your managed companies.
- You can also add/modify the company details, if needed.
- You can add/modify line items

Important note: You can give your Partner companies the responsibility of stewarding their own users, units, and jobs. When you add a Partner Admin, they will get limited access to your hub where they can add/manage only their own company’s data.
For example: Internal Admin from Oil Co. can add a Partner Admin from Vendor Co. This Partner Admin would log into the hub, and start adding units and users that belong to Vendor Co. They will not be able to to see users, units, or jobs that belong to another company.

ALL DONE!
If you have follow-up questions, email support@ironsight.app